![]()
| The previous mention of splitting along the nose of his Revell MII Spitfire by Mike Hobbs allowed me time to avert the possibility. This was achieved by gluing 30 thou plastic card squares along the join to increase the contact area and add support behind the join. It was satisfying to bring both body halves together, but it was not without some fettling. | 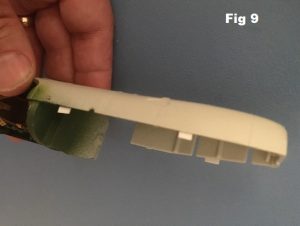 |
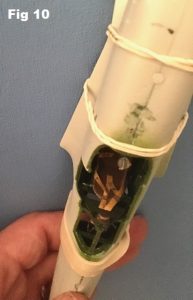 |
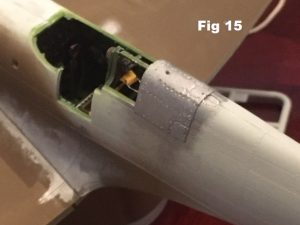
The decision to work on the cockpit as two separate halves worked for the most part, but the gunsight was knocked off in the process (and lost) so that will need looking at. The spine fit around the head rest was not perfectly central, probably because I’d glued it to one wall already. Clamping in place eliminated this problem but did cause the nose to want to part- hinting at the tensions Mike mentioned. Rubber bands at key places around the fuselage and double gluing was done (tackled with Revell Contacta on the reverse sides then top finished with Tamiya extra fine). |
| The assembly was left 24hrs. I was glad to find after removal of the bands that the join was strong, but a fine gap was visible just ahead of the cockpit that required some filler and soon disappeared. | 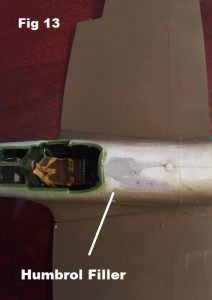 |
| The next join that sometimes causes problems if not flush, was the wing to fuselage line. I did this in 3 parts rather than follow the instructions which has you make the wing fully before fitting, doing it in 3 allowed me more room for movement in lining everything up. Clothes pegs and tape were deployed and again the whole thing left 24 hours. I’d already put some base colours on to the sub-structures, I find it helps to get into the restricted areas and I can use the breakdown of parts to give neat demarcation lines. | 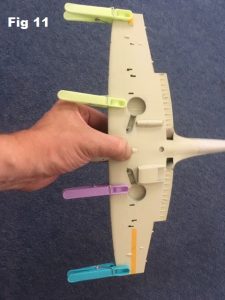 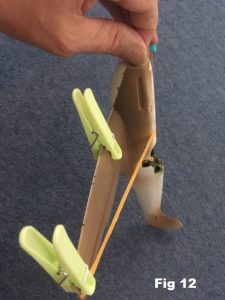 |
 |
While the wing and body set I knocked up the rear tail planes, the instructions show a triangle of plastic needs removing and a cut line is engraved. |
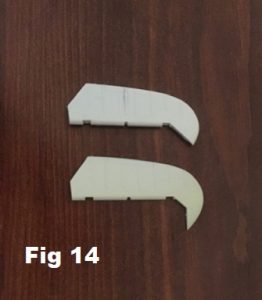
| For the most part modellers want to achieve a scale result, but sometimes compromise is required and as I was telling a story with this model of a particular Spitfire, I decided to modify the spine just behind the cockpit. In reality when forced down by a Bf 109, N3277 was struck by local enemy flak with some shrapnel damage done to the area behind the rear cockpit coaming. I have no evidence of when and how the repair was done but It clearly is not present when the aircraft was renumbered 5+2. I used a sheet of 10 thou plastic card cut to cover the damaged area and overlap onto a rivet line as a location that a field repair might attach a metal sheet to. | 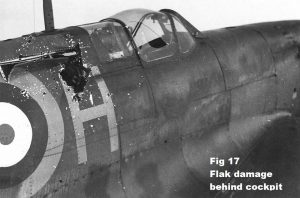 |
 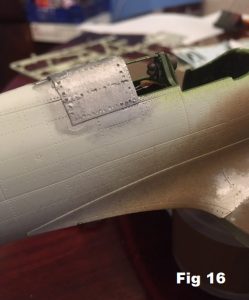 |
I sanded it even thinner on the edges and glued it into place, being so thin the glue softened the Plasticard so it was left for a while to harden. Then using a fine drill bit I indicated new coarser rivets along the repair. At the time I was not certain how much weathering I’d be doing as maintenance of captured aircraft was high, but I painted the area silver in-case I was going to be chipping with the hairspray method. |