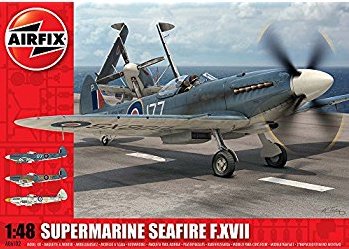
 After completing my Sea Hurricane, part two of my trilogy of single seat naval fighters from Airfix is their Seafire Mk 17, first released in 2011.
Those of you who read my Sea Hurricane build will know the methods I like to use, so I won’t give you a “blow by blow” account, but hopefully can point out some of the features of the kit.
Being from the “new generation” of Airfix kits, the panel lines are both recessed and a little heavy. The plastic is soft and easy to work with. Two complete sets of wings are provided – one spread for flight, the other folded for stowage. There’s a pilot – who is the “Large” to the Hurricane kit’s “Little”; there are no less than three sets of wheels – for raised, unweighted and weighted options; and a set of rockets and drop tanks for those who like to hang things under the wings. The flaps are separate, and whilst Spitfires and Seafires are usually seen with flaps raised when on the ground, I wanted to show mine in the fully lowered (almost 90 degrees) position for this build. There is also a separate pilot’s entry door for the port fuselage half if you want to pose this open.

 Construction is conventional – the only modification I made to the cockpit was to drill out the holes in the bulkheads. There is no decal for the instrument panel, but the raised detail takes a dry brushed coat of a pale colour nicely to bring out the bezels and switches. The instructions call for black upper side panels with Sky lower panels in the cockpit. I wasn’t totally convinced by this, so opted for interior green for the lower parts. There is some debate about whether Seafire Mk 17s (or perhaps Seafires in general?) had the flare rack fitted to the front edge of the seat – I left mine in place.
In marked contrast to the Hurricane, this kit fits together really well. Construction was therefore pretty rapid – once the cockpit was painted the rest of the airframe was built up quickly and with very little filler needed. The various control surfaces are all separate and therefore posable in deflected or dynamic positions if you are so inclined.
For some years now I’ve wanted to build a model depicting an aircraft from 767 Naval Air Squadron – used as part of the 50th Air Training Group to train Deck Landing Control Officers. Their repetitive circuits and touch and go landings earned them the nickname “the Clockwork Mouse Squadron”.
 There is a profile of SX156 in my Aviation Workshop book that attracted my attention – partly due to the white fin and rudder, and red spinner; partly due to the simultaneous use of wartime and postwar roundels; and partly because I like that the aircraft’s serial number and squadron number are both “156”.
After priming and shading the panel lines, and before fitting the tailplanes and elevators, I therefore painted the vertical tail surfaces white, using Tamiya acrylic, and masked these off. Then it was on to the Sky undersurfaces and fuselage sides, followed by the Extra Dark Sea Grey. These colours were both from Vallejo.
After a gentle rub down with a fine polishing cloth, and a couple of coats of Klear floor polish, I applied the decals – using a mix of the kit schemes to give me the wartime wing roundels and post war fuselage ones.
The underwing serials came from a Ventura sheet of letters and numbers; the “156” on the fuselage came from a set all the way from Australia; the smaller titles and serials on the rear fuselage were made up from a mix of kit and spares box.
 I decided to give the model a wash with my preferred choice – Flory Model’s “Dark Dirt” – but in this instance I think the somewhat wide panel lines and the pale Sky colour have produced a rather overdone effect – to my eyes it does look dirtier than I had intended and the panel lines too pronounced..
I drilled out the exhausts, and fitted the various detail parts. I thought for a moment that the rather overweight pilot was not going to fit – but managed to force him in. Care is needed with fitting the undercarriage – I failed to push one side home fully, so it doesn’t sit quite level…
 I have a notion to pose this model on a small diorama with the aircraft in flight – just about to touch down on the runway, with a trainee DLCO giving the “cut” signal to the pilot. Perhaps it’s a bit of a gimmick, but I thought it might be fun to have the prop spinning, driven by a small fan just off the edge of the diorama: so I needed to create a really free turning spinner and propeller. Once again, our friendly local model shop came to the rescue with some Albion Alloys brass tubing of differing diameters, that are a slide fit inside one another. I carefully enlarged the opening in the front of the fuselage to accept a piece of 3mm brass tube, and glued a 2mm piece into the back of the spinner. The result is a prop that spins very nicely – although whether it will work for my diorama remains to be seen….
Comparisons with my recently completed Sea Hurricane are inevitable. The Hurricane’s panel lines are definitely finer, and the whole kit has a slightly more refined look to it in the box. To build, however, the Seafire is a joy, whilst the Hurricane was a struggle. Overall, I would say that the Seafire is without doubt the better kit.
Now, to finish of the final instalment of my trilogy – the new Sea Fury….

Nick W.


