When it comes to my hobby and model making, I know I procrastinate a lot!
Reasons vary but for this Mercedes 540K it was very clear.
I had fallen out of love for the model I was working on. And not for the first time.
When the IPMS Salisbury Group Build in 2021 was announced as AUTOs I thought it would help galvanise me to start an idea I had for the Italeri kit over a year prior but apart from buy the model had done nothing to pursue.
As the 4 previous instalments show, I had started well but fizzled out.
I think a few things caused that. Firstly, I started to doubt my own research and get confused. Secondly, and more obvious when I returned to work on the 540K, was how poorly my painting had become due to deteriorating eyesight. I now wear glasses and it was a disappointing revelation when looking at the driver I had made.
So now in 2025 I have resolved to finish this Mercedes. At first I just intended to rush it to completion, but I’m glad to say once I decided to rip out the driver, it started to look better, and I ended up with something I was pretty happy with. So here is how it finally went…
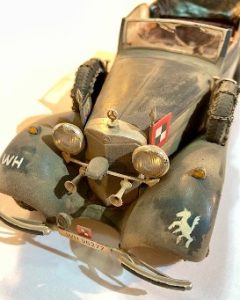
1. Using ‘Silliputty’ I made moulds of 1/24 parts from a Hasegawa Kubel Wagen. A NOTEK front light, NOTEK rear light and a horn. The 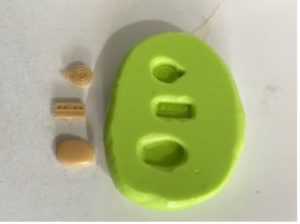 front NOTEK light replaced the central light of the 540K.
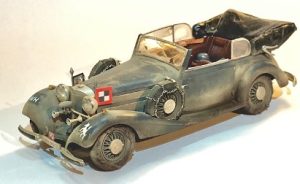
2. Ripping out the driver figure did some damage to the seat. I hid this by placing a folded map. I added other 1/24 personal items in the vehicle on the back seat also to make it look in use, as if the occupants had just left. This will fit the scene if I get round to making this part of a diorama. The famous ‘if’ of procrastinators.
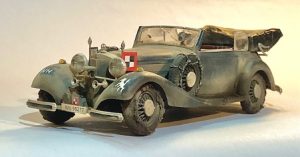
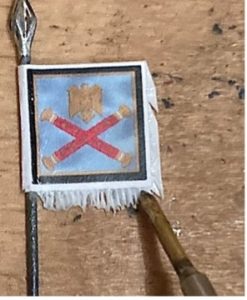
3. Holes were drilled inside of the sweeping front arches to fit the flag holders taken from an ICM G4. I made the Command flag and central bumper plate for the commander-in-chief of an army command on my computer. Once printed of I overpainted the design and mounted it on 10 though plasticard. The Vehicle pennant for General feldmarschälles of the Heer was from ‘True detail.’ I added tassels along two edges by having the 10 thou card bigger then scribed the resulting boarder with a pyrograuve.
4. In one picture I’d mistaken a Mercadez 320 for a 540 and had been relying on this photo as evidence of a jerry can attached to the boot door. The length of the hinge and handle arrangement was the key to re-evaluating the picture. Sadly once I then re-looked for 540’s with similar fits I found none. I already knew pictures in general were thin on the ground but hoping for that specific detail was a wish too far. But the lack of evidence also allowed me to model it as I had seen on the original picture without fear of contradiction so that is what I did. Once again the Hasegawa 1/24 Kubel provided the jerry can and I scratch built the holder. Below the boot opening I placed the cast NOTEK rear light.
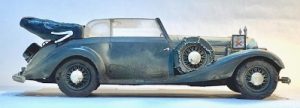
5. The wheels looked a little thin in profile and it was niggling at me. Nick at the club knows his classic cars and reassured me that spoke wheeled autos do have thin wheels but to me it just looked wrong on a car destined for the front. I removed the wheels, another backwards step and started to split them back into two halves. Progress again stopped as while the front two successfully split along the join, the rear pair stubbornly remained glued tight.
So this was what I did instead.
Once the wheels were re-assembled I smeared a layer of ‘textured mud’ putty around the treads so that it flared out this hide the thin look of the tyres by camouflaging the thickness using mud.
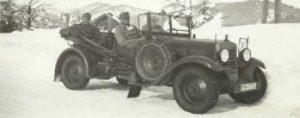
During my search to find better views of the wheels I noted a number of German vehicles had snow chains fitted to the spare wheels. I figured it must have been quicker to swap around two tyres than try to fit chains on the wheels in situ. I added chains to the kit’s spare wheels using real chain ‘found’ in my wife’s jewellery box.
6. Bringing all the remaining parts together relied on some super glue and crossed fingers as the thing was getting delicate. Wire rant from the front NOTEK into the light mount. At the rear the jerrycan holder already mentioned was mounted and a strap to secure made from a strip of ‘band aide’ (AKA plaster for cut fingers) cut to 1mm thickness and painted.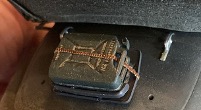
7. The VRN for Bock was made on the computer and added to front and rear bumpers, it is at lease a correct VRN for this 540k even if I’m no longer certain it would have appeared at the Russian front. And it matches the pennants I have mounted on the wheel arches. More textured putty was then worked into the recesses of the body and under the wheel arches.
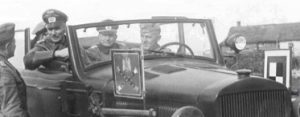
8. I sprayed light mud all over the areas that would receive road spray, removing it again where human interaction would logically take place such as car door edges, bonnet opening and to clear off markings. A slighty moist cotton bud did the same for the windows. Once done the same light mud colour was used but with a few drops of gloss varnish and a drop of dark brown, this was sprayed lower on the body and under neath to simulate fresher, wetter mud.
I have to say, I’m glad it’s finished. It looks like I thought it would at the outset even if now I’m less certain of it’s accuracy.