A Life Saving Lancaster
 In 2005 Hasegawa released a new tool 1:72 Avro Lancaster. In typical Hasegawa fashion, there then followed a series of different boxings, some featuring alternative or additional parts, to allow a number of versions of this versatile aircraft to be modelled.
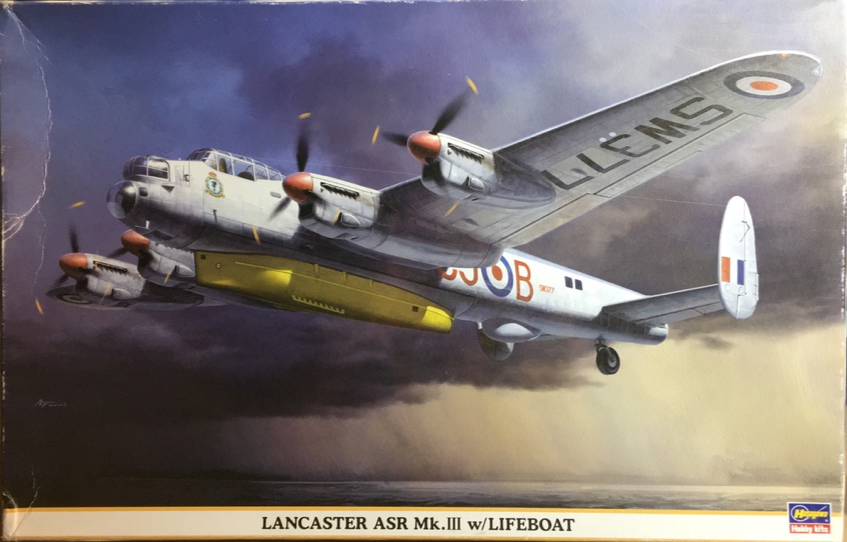
2009 saw the release of the “Air Sea Rescue” edition – complete with a resin rendition of an air dropped lifeboat mounted on the belly.
A number of things drew me to this kit: I liked the post-war grey and white scheme; the deleted mid-upper turret; the option for the Lincoln type rudders; and of course that lifeboat.
I hesitated to buy the kit, however. It does not fit with my usual theme of the Fleet Air Arm in 1:48 scale, and it wasn’t cheap. As a result, I missed out on one when they were initially released, and I watched the price of examples on eBay creep ever higher – most recently to £120.
At our show this year, I spotted one for sale on a club stand. It still wasn’t cheap, but it was significantly less than the eBay prices and so I relented and bought it.
Perhaps driven by the amount I had spent, or that I had just finished the long, long build of a 1:48 Barracuda, I decided to promote the Lanc to the top of the build pile, and made a start.
The Hasegawa Lanc has been criticised for having a relatively basic interior. That did not bother me too much as it is largely black, and the numerous small panes of the greenhouse canopy make seeing interior detail quite difficult. There were a series of unrealistic moulded holes in the cockpit floor, so I covered this with a thin sheet of plastic card – I even riveted this, but you really cannot see it. I added some basic seatbelts and armrests to the pilots seat; I also removed the armoured headrest as I image these w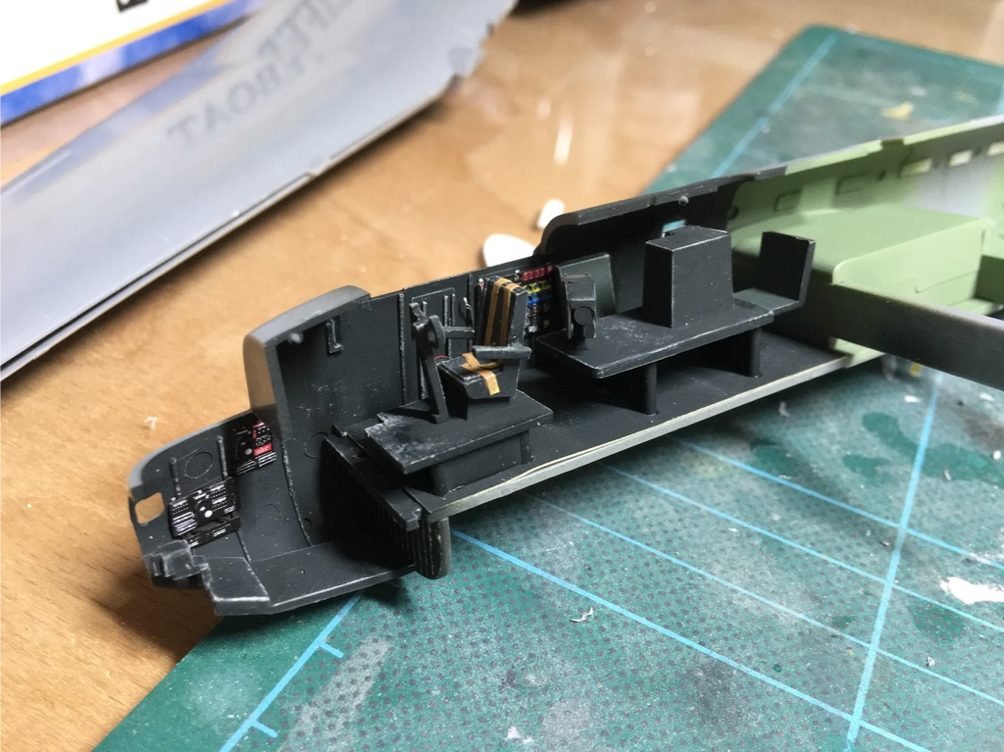 ould not have been fitted to a post-war aircraft. I thought the instrument and flight engineer’s panels might be visible, and are quite colourful, so I did splash out on some pre-painted Eduard photo-etch versions of these.
This post-war version did not have the row of small, oblong windows down the fuselage side. I made a mistake here – instead of gluing the hard, clear plastic windows in and then using a small amount of filler over the top, for some inexplicable reason I decided to glue strips of plastic card to the inside of the fuselage and fill the apertures with filler. The result was that the filler was deeper, and tended to shrink, requiring several applications before I could say that all traces of the windows were gone. The repeated sanding of the filler meant that some of the panel lines were lost; the re-scribing of the lines resulted in some mistakes and so more filler – it became something of a vicious circle…
I was more successful in opening up the observers’ windows in the rear fuselage – after drilling round the guide moulded on the inside, I enlarged the apertures slowly with a file and was able to ensure a tight press fit for the clear parts.
Assembly of the model then proceeded quickly. The overall fit of the kit is superb and required very little work on the seams. The wings slot over two spars, and the wing root slots into a recess in the fuselage sides, so it is possible to build and paint them separately and assemble the model later.
With all the work that had gone on with the windows, the fuselage was a patchwork of primer, white paint and bare plastic. I therefore primed the fuselage (but not the wings), and then pre-shaded the panel lines with NATO black. I used Tamiya paints for both the white (XF2) and the Medium Sea Grey (XF83). Masking was relatively straightforward given the straight lines involved – an Eduard masking set for the canopy and assorted other clear parts saved a lot of time.
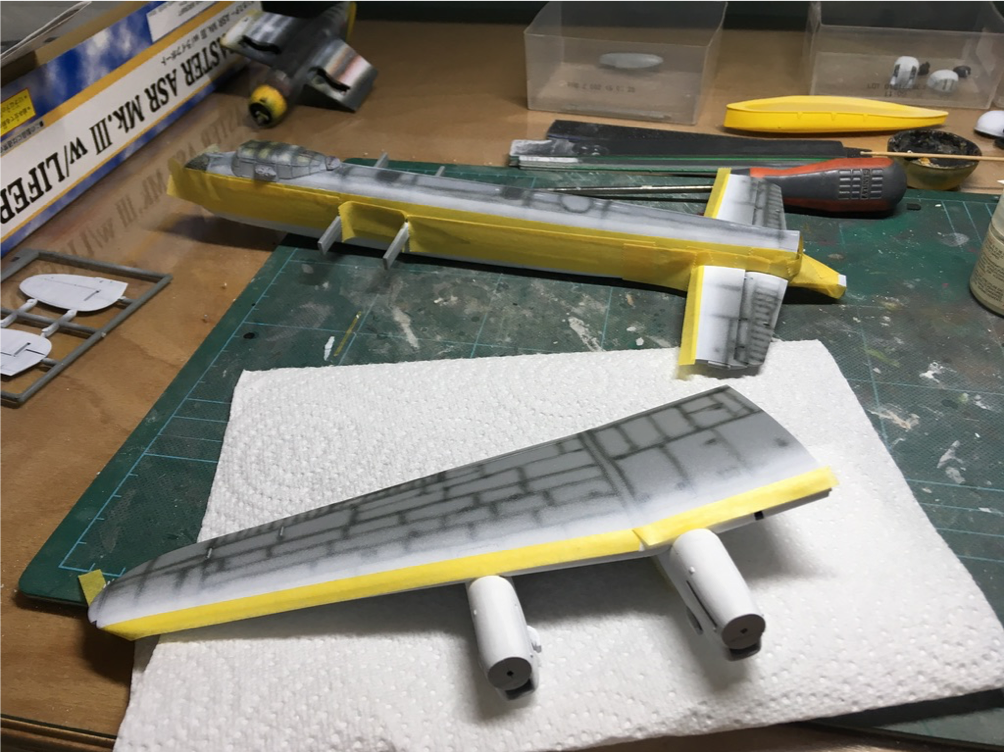 Once the main colours were on, I first mixed up a shade of darker grey and emphasised the panel lines that would be affected by the exhausts. Likewise, on the underside, I used a shade of pale brown to the same effect.
I decided to try Xtracolor gloss varnish to prepare the surface for the decals. It did impart a bit of shine, but remained tacky for weeks after application (in fact the model still feels very slightly sticky even now…) A really good gloss coat is still one area of model making that definitely escapes me. I polished the airframe with some new sanding pads to try and obtain a really smooth surface – I was very concerned about the “walk here” decals on the wings silvering and spoiling the whole model.
I used a panel line wash: a darker colour on top and a paler grey on the white, both from Flory. More by accident than design, I ended up with an airframe that captured what I was after – a well used and somewhat grubby look.
The decals are a mix. From the kit came the serial numbers, squadron codes and crests, wing walk stencils and tail flashes. I would have used aftermarket decals for the tail flashes, but they are surrounded by a thin black outline and I could not see how I could reproduce this easily.
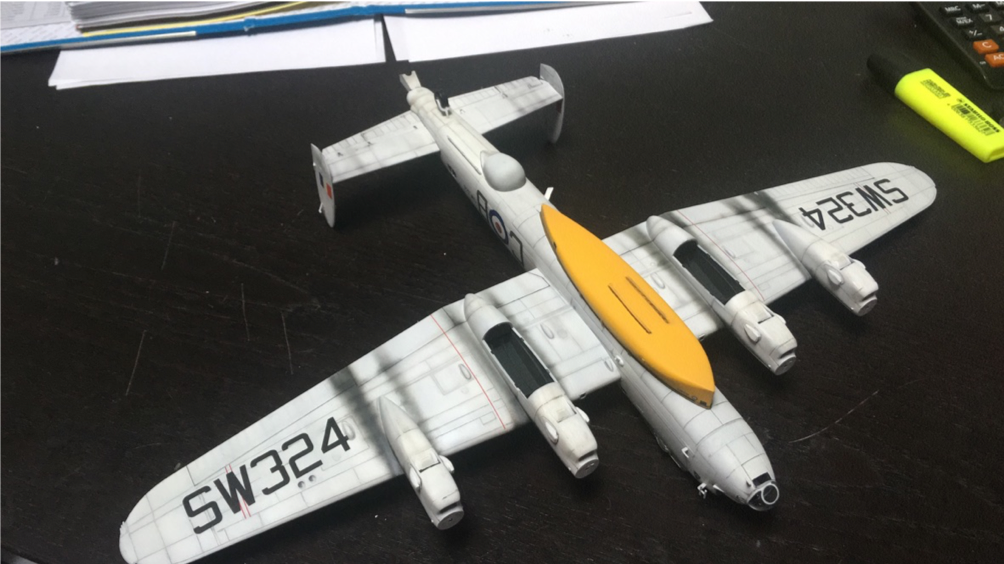 On the whole the kit decals behaved really well, although they took a long time to separate from the backing sheet. The “walk here” stencils were tricky – in my impatience to apply one of them I broke it into four pieces – but I did manage to avoid most of the dreaded silvering – they’re not perfect, but they are good enough for me. I thought the kit roundels were too bright, and the white part of them was more ivory in colour and looked odd against the white parts of the airframe. So I used aftermarket ones for these. As a result the red and blue of the roundels does not quite match the same colours on the tail flashes…
Once the decals were on I applied my tried and tested Xtracolor matt varnish thinned with white spirit, which imparted a flat finish (and reduced somewhat the stickiness of the model!) and I then turned my attention to the very distinctive exhaust stains. I mixed up some dark grey and, again, concentrated on emphasising the panel lines that are in the path of the exhaust as it streams across the wings (and to a lesser extent the tail planes) to suggest a build up of dirt in these lines. Once the dark grey had dried, I added a little very pale grey to the airbrush and added some paler lines to the centre of the exhaust streaks. My references showed that Lancasters did have really heavy exhaust staining in many cases – and that the outermost exhaust on each side tended to flow more under the wing than over. Against the Medium Sea Grey and white the effect is quite stark – but I am pleased with how it turned out.
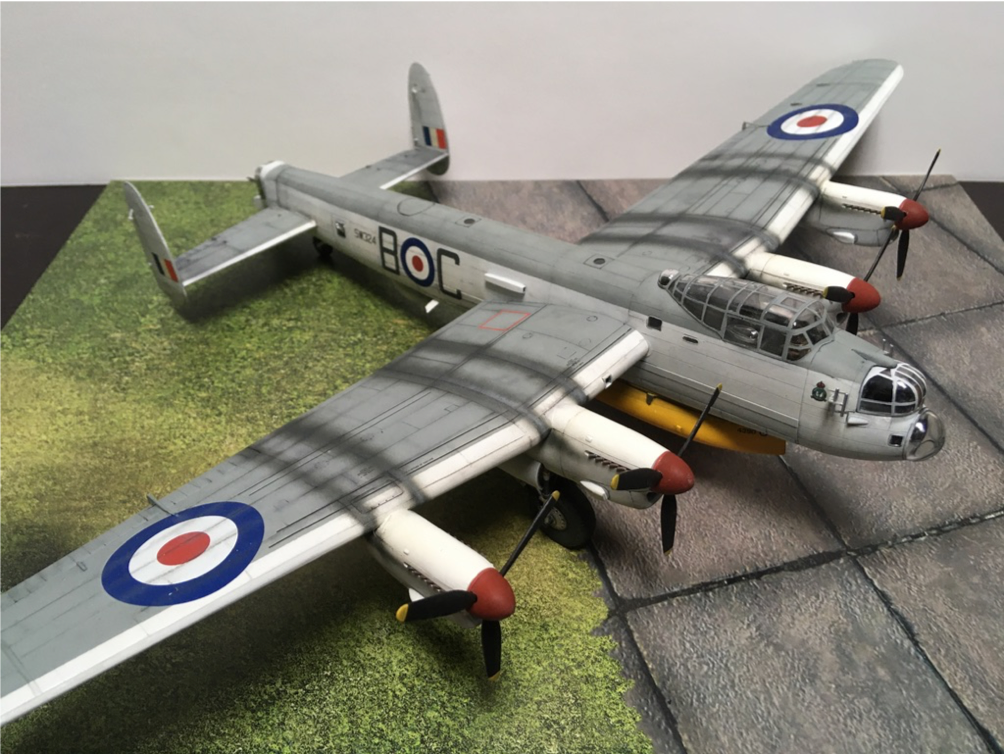
The resin lifeboat was primed with Tamiya white primer from a spray can. Initially I painted it pure yellow (XF3) – but it looked too bright. I therefore added some dark yellow (XF60) into the mix and went over it again – as well as painting the “seal” around the top where it joins the bomb-bay in a dark green. It fitted beautifully – I used a two part epoxy to ensure I had time to position it correctly.
For the props and spinners I first primed them and then painted them with Alclad “White Aluminum”. After applying a black coat to the props (Humbrol enamel – no.33 of course!), I was then able to gently scratch and scrape them to reveal some of the silver colour underneath. The spinners were painted with Tamiya’s red (XF7), but, like the lifeboat, I didn’t think a really bright colour would look right – so I added a drop of grey to darken the shade a bit.
I am told that post-war Lancs used block tread tyres – so I ordered some resin ones from Freightdog – they were ok – there was a bit of a seam that needed rubbing down which removed some of the tread and there was no attempt to recreate a weighted look which is quite prominent on such large, low pressure tyres. The Hasegawa tail wheel is strangely large – a rare inaccuracy – and so I replaced it with one from the old Airfix kit that was in my spares box. (The other well reported inaccuracy with Hasegawa’s Lancaster kits is that the escape hatch in the canopy above the pilot is too far forward – I was not about to start attacking this clear part with sanding sticks and scribers so have left it as is…)
I left the guns out of the front turret as it seems that few, if any, Maritime Reconnaissance or Air Sea Rescue Lancs flew with them. I filled the slots with Microscale’s Krystal Klear (i.e. white glue) and then painted them dark earth. I decided to leave the tail turret guns in place and used some lovely brass barrels for these. Unfortunately some paint crept into the rear turret during the build, and having glued the turret together, there is no way I can dismantle it to try and clean it out – so that is another blemish I will have to live with.
My overall impressions of this kit are very favourable. The fit of the parts is generally excellent and that makes it a pleasure to build. The quality of the plastic, the moulding, and the panel lines, are up to Hasegawa’s usual high standard. I haven’t built Airfix’s newer kit, nor the most recent of Revell’s versions, so cannot make a comparison with them, but this one from Hasegawa is a quality product.
Nick W