History
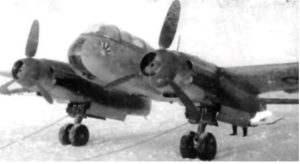
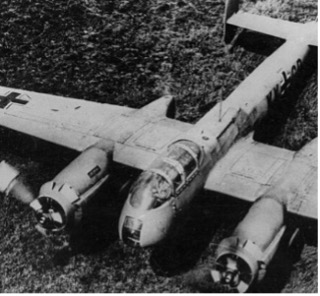
The Ar 240 came about as the response to a 1938 request for a much more capable second-generation heavy fighter to replace the Bf 110.
At this time Arado had been investigating several lines of research into aeronautical design and increased performance. The ‘(Arado) travelling flap’ which offered excellent low-speed lift performance, the design and construction of pressurized cockpits to dramatically lower pilot fatigue and increase comfort for flights above 4,500 metres and in technically advanced remote-control defensive gun systems using a gunsight located in the rear of the cockpit, operated by the navigator/gunner, with periscope optics on the top and bottom of the aircraft to allow aim in any direction. For the Ar240 design, the Arado engineers combined all this research into a single airframe, and therein lies its protracted birth.
For outright speed performance, they used as small a wing as possible, thereby lowering parasite drag, this would mean the plane having too high a landing speed, but this was offset by the use of a huge ‘travelling flap’ and leading edge slats for high low-speed lift. When the flaps were extended, the upper portion of the ailerons would remain in place while the lower portion extended rearward, thus increasing the wing area to improve handling. And the Ar240 did become a fast fighter, of the small number that did see service a few did reconnaissance flights late in the war over England with impunity which is just as well as they had been stripped of armament to lessen weight.
The cockpit was fully pressurized, the remote-control defence MG system allowed the streamlined turrets to be located in the unpressurized rear of the fuselage so not breaching the pressurised cabin.
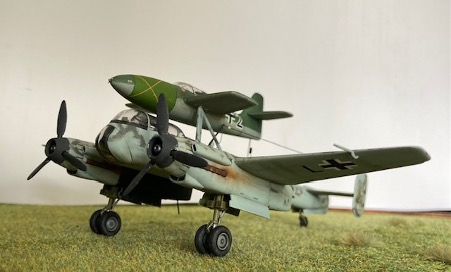
The aircraft went through a lot of changes in development most notable was the tail design so that it could operate as a dive bomber with an airbrake that opened at the tail. Of note also are the ducted open prop-spinners that allowed air to flow through to the radiators behind, at times the aircraft can be seen with the spinners removed. It also swapped between a 3 or 4 blade prop.
Poor handling and constant attempts to modify problems throughout its life meant production was quickly terminated, depending on sources between 12 to 18 where actually built, but it is worth noting that despite such small numbers it was to serve in Finland, Russia, Italy and in the Western Theatre.
There is no record of it ever being used as a ‘Mistel’ composite aircraft, but it did go through development to be a night interceptor armed with radar and the ‘Antler horns’ associated with that role. It was also to be further worked into a high-altitude aircraft becoming the Ar 440 but that too was stopped. It’s life very much mirrors the Me 210 and 410 but with less success.
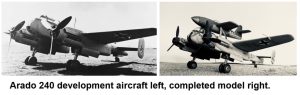
The Model as I have made it uses the Revell kit (Number 04331) with the PM Messerschmitt 328 kit added, as discussed in the Jan/ Feb 2024 IPMS Salisbury Club Newsletter to portray a plausible ‘Mistel’ bomber.
Building the Ar 240
This article concentrates on the Revell kit build. But note I am not an aircraft modeller and for better examples of airplane building look elsewhere on this site. It was an enjoyable build experience though so hopefully of interest. Also there are errors in the Revell kit, not surprising as the few examples of the real thing varied so much and I did not correct those issues that have been publicised but did add a improvements along the way, I have no references to correct the errors so what Revell provide is good enough for me. Revell should be commended for kitting a model of such a rare aircraft for the mainstream, in fact Revell have made two versions as the 4 bladed night fighter is also a separate kit by them.
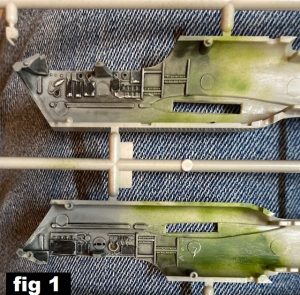
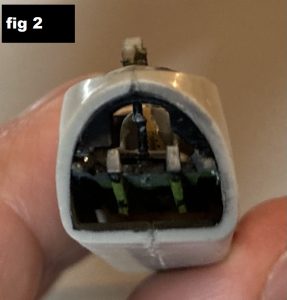
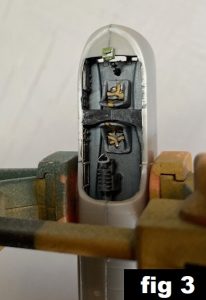
The light grey plastic has decent panel line detail and no riveting. No flash was present but some sink marks. The cockpit was made up as per the instructions. Part 1, the floor panel is basic but has the indication of pedals at the front. I added some gizmology from the pedals running under the cockpit floor to fill that area. The cockpit sides are moulded into the fuselage sides (fig 1, 2 and 3) and do have a good amount of detail which painting brings out nicely.
 |
 |
 |
The seats have raised seatbelt detail that with careful painting looks decent. Part 5 is the hydraulic remote control for the turret gun system. It looks oversize, but I used paint to busy the part up and figured it might suit to be a bit more obvious once the glazing distortion was accounted for.
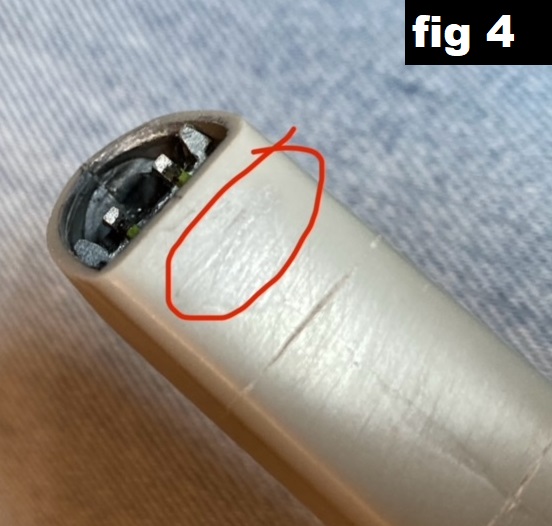
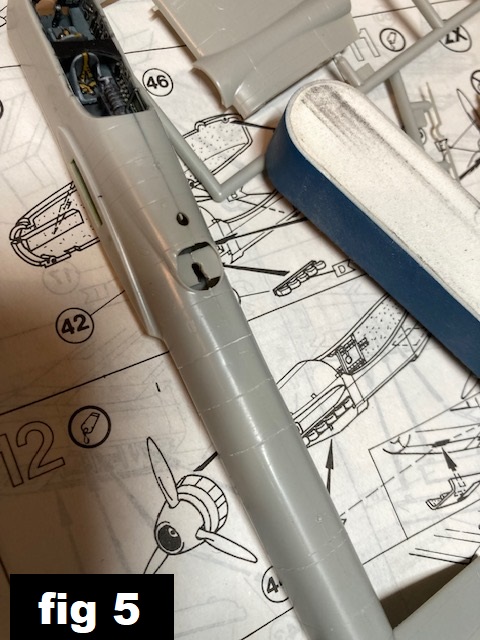
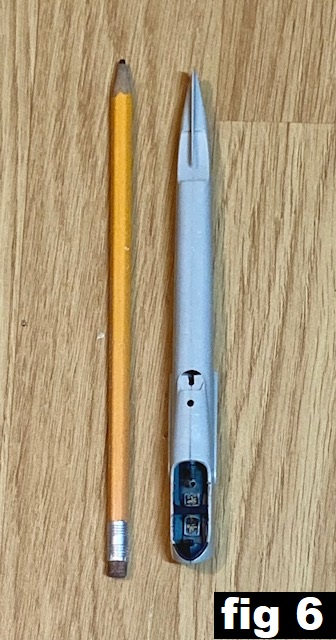
I skipped step 2 as I intended to fit the turrets after most of the build was completed. The fuselage is in 4 parts.Split down the centre as youwould expect but also split between the pressurised cockpit and the slim rear fuselage. Step 3 and 5 were done simultaneously although the front and rear were only brought together after dealing with filling and re-scribing. Apart from part 9a (the dive bomber site) leave all the clear parts in step 4 off till later. All joins were very good, so filling and sanding was only needed for the sink marks that were found on the outside of where location pips were sited. (fig 4) My scribing needs practice but all lines lost to sanding were replaced. With the complete body fully assembled it’s surprising how slim and petite this aircraft is, little bigger than a pencil. (Fig 5 and 6)
 |
 |
 |
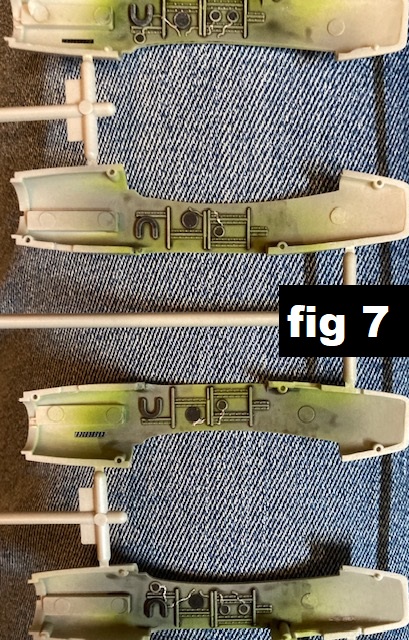
The tail added in step 5 and steps 6,7,8 are simple and fit well. The engine nacelles/undercarriage bays were built in steps 9 and 10 leaving of the glazed camera port to fit after painting. Once more nice internal detail is present on the walls that can be brought out with paint and washes. (fig 7)
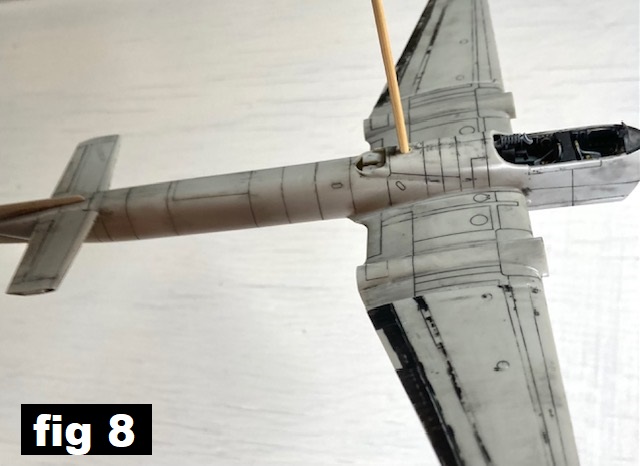
As I mentioned at the outset, I’m not an aircraft modeller but do admire many of the models I see on club nights and wanted to mimic some of the finishes I had seen. As my previous attempts at panel lines were less pronounced than I would have liked but I also didn’t want them overstated I decided to use black oil paint on the un-primed plastic, wiping it of to leave it very obvious in the panel lines, also painting certain areas black such as access panels or flaps. The contrast should show through the light colour of the basic paint colour I was to apply. (fig 8)
The streamlined turrets could be added now as soon as I’d got a base coat of colour on, I’d cut a groove in the mount so I could fit the stubs in sideways, I was intent on gluing them in place so the instruction’s method of fitting had been ignored. This also allowed me to paint up the gun barrels with ease. Detail painting of the props was done now so they could dry. The inside and outside of the spinner was also airbrushed in dark grey with tiny chips of silver added.
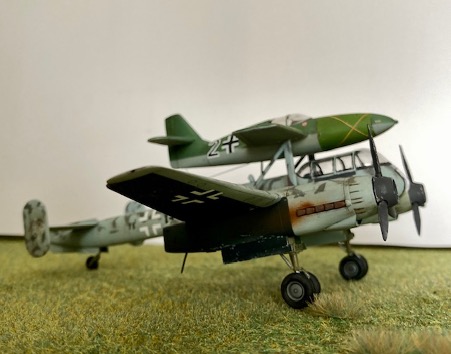
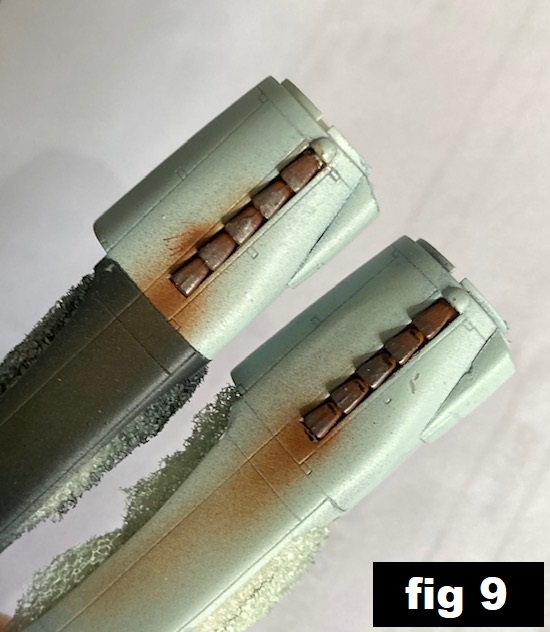
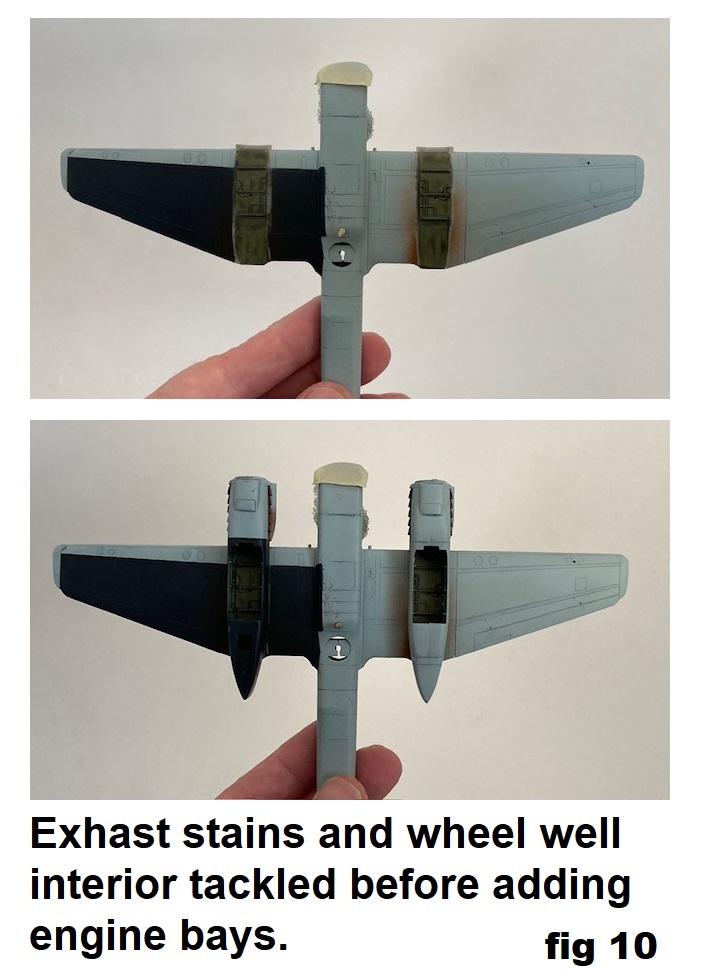
I painted the body and the engines while separate, masking off the wheel well roofs. I did this so I could then airbrush on the exhaust plume as it would be difficult to reach into the gap between fuselage and nacelle once in place. The scheme I chose was influenced by late war He 219 ‘UHU’ aircraft rather than the Russian front scheme in the kit. Having an asymmetric black undersurface was meant to aid friend or foe identifying by German AA gunners as too many returning Luftwaffe aircraft were being shot down by jumpy gunners who expected only Allied aircraft since Germany had lost command of the air. Some small chips were added to the black. (fig 9, 10 and 11) I ignored fitting the props and spinners from step 11 but added the engine front after scribing the louvers as well as the remainder of parts in step 12. The fit of the nacelles in step13 is excellent.
 |
 |
 |
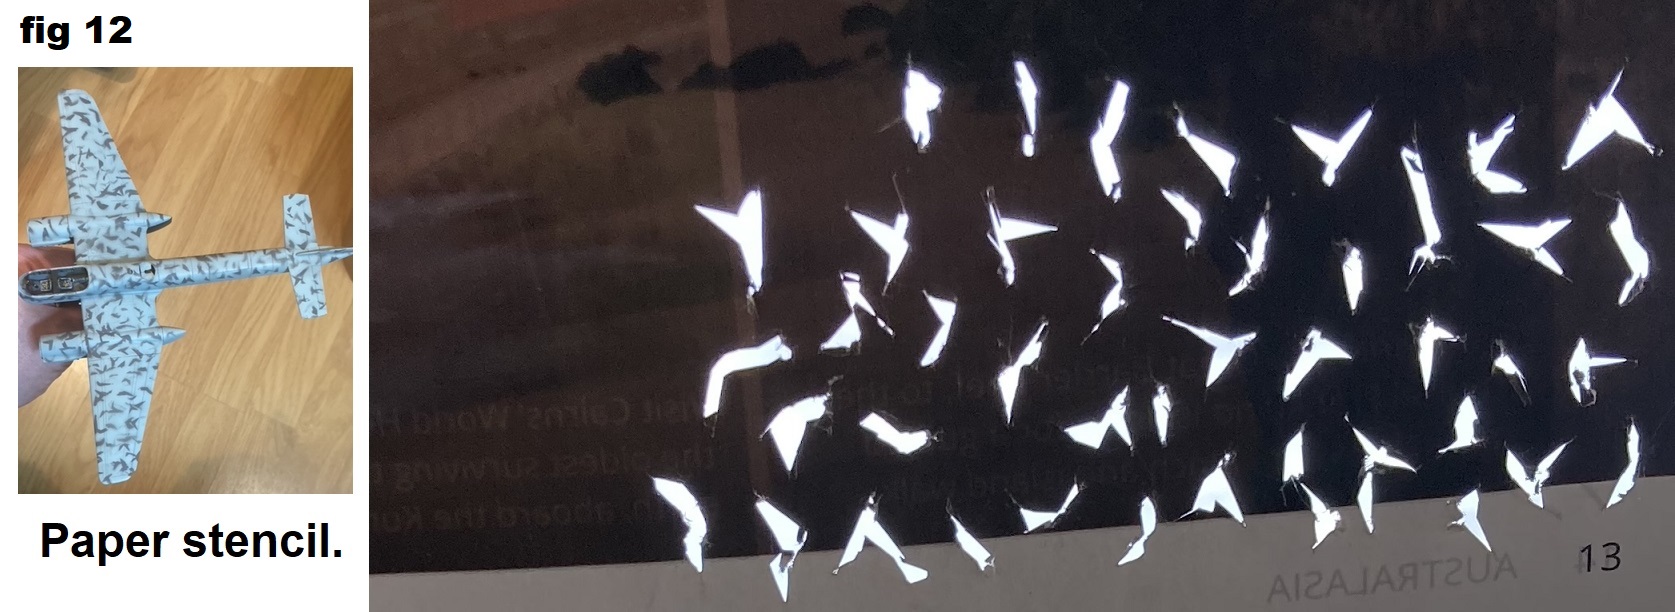
The basic colour (RLM 76) had been applied around all surfaces and the black underwing too. Next I used some nail scissors to cut a stencil using a glossy page from a magazine. Basing the shapes once again on the Luftwaffe late war night camouflage this time seen on a Do 217 I cut a band of shapes about 1×3 inches. This had RLM 75 Grey Violet sprayed through, the stencil just held by the opposite hand and moved, turned and flipped to give variety to the pattern. After leaving over night to dry overspray was neatened by dry brushing the base RLM 76 over anything I wasn’t happy with. (fig 12)
Swiftly head on to step 18 if you are having the wheels deployed, the bay doors are all supplied as a single part that need a knife running through a few times to separate, a nice groove is provided to aid in this.
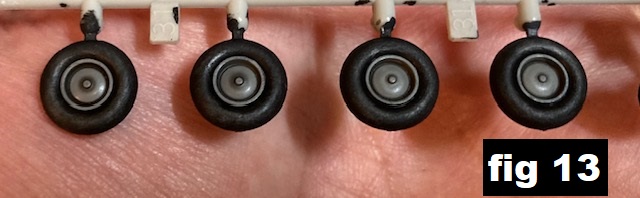
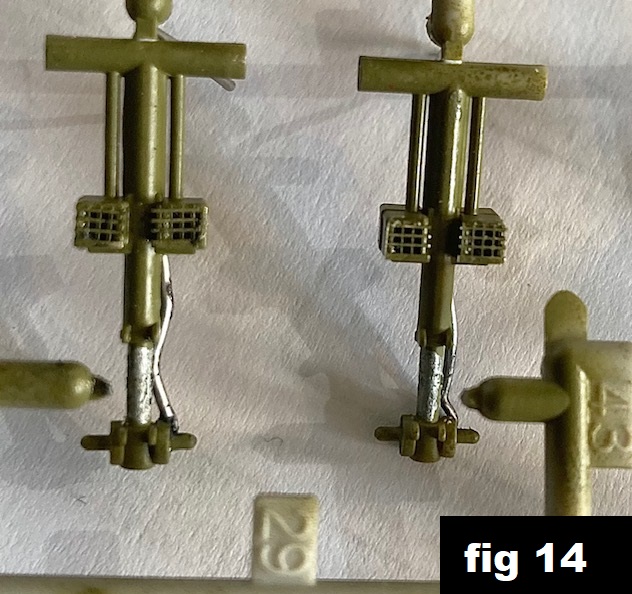
Step 19 is duplicated as you are making the undercarriage legs and wheels. The aircraft has additional radiators on the leg, I used little squares of Photo-etch mesh to detail up the front of the radiators and a length of solder to add some sort of brake line. Step 20 brings all the parts together including the single wheel stay, which if other people’s research is correct should be 2 stays. (fig 13 and 14)
 |
 |
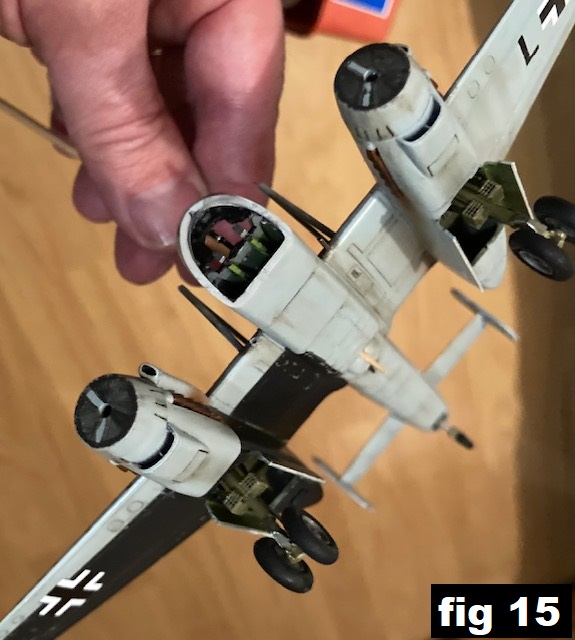
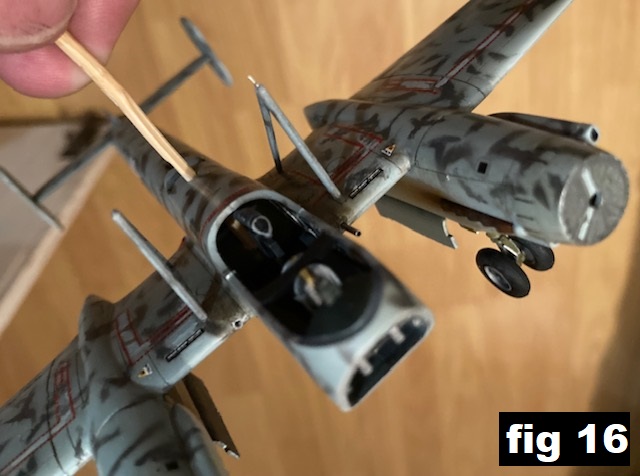
I read that the face of the JUMO engines that sat behind the spinners was similar to the radiator fronts on the inline JU88 so I looked at making them look the same. Off cuts of Photoetch protruded so I discarded that idea and used Gun metal paint to draw the lines of the radiator on. It didn’t matter, nothing is visible once the props and spinner are in place. While looking at the radiators I decided that the MGs mounted in the wing between the engines and fuselage looked a bit simple so drilled them out and used cut down metal tubes, taken from the nozzle of Revell Contacta Cement, to replace them. (fig 15 and 16)
 |
 |
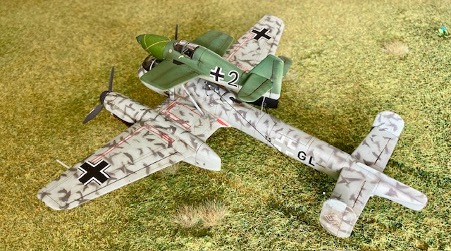
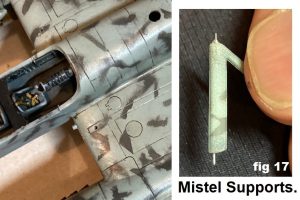
The intention to mount a second parasite aircraft above the Ar240, an Me328, on a Mistel frame was now tackled. The PM kit of the Me328 included a simple pair of frames. I identified where on the wings of the Arado a strong spar might be located and rather than rely on a butt join between frame and wing I drilled holes in either part to insert a fine wire. This was also done between frame and Me328. (fig 17)
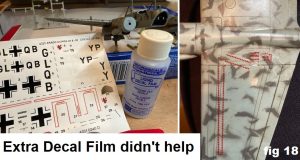
Decals were done following the wise principals passed on of coating the surface in ‘Klear’ before starting (fig18). The version of the kit I was building was old having been in the stash (it is being re-released in 2024, the instruction steps might be different, but the construction will no doubt be the same) so as a precaution I coated the decal sheet in ‘Microscale’ decal film, sadly it didn’t ‘do what it said on the tin’ and the decals broke up. I supplemented the kit decals with a spare FW sheet by HAD that also had swastikas on it as Revell does not supply this particular insignia. Some silvering was present despite the ‘Klear’ coat so using a very fine brush, I over painted any clear film that was showing signs of silvering. A gentle treatment of a dark brown and black oil paint wiped of with cotton buds weathered the decals and any panel lines I wanted to improve.
The final parts are all simple to place. As I was making my Ar240 as a Mistel I canted the antenna mast to port to clear the parasite plane. From this mast I used stretch sprue to rig a radio wire to the port stabiliser.
I’d kept the clear parts away from the modelling bench (just in case) but after painting the frame dark grey, then in RLM 76 to match the airframe added the front and cockpit glazing and the two periscopes (fig 19). I assume they move in unison as only one gunner is sat in the cockpit so made sure the periscopes and turrets all pointed the same way. While not my usual modelling endeavour this was a very pleasing build
.
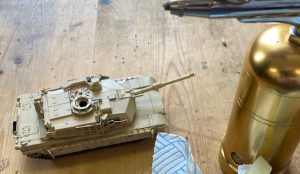
Finished model