![]()
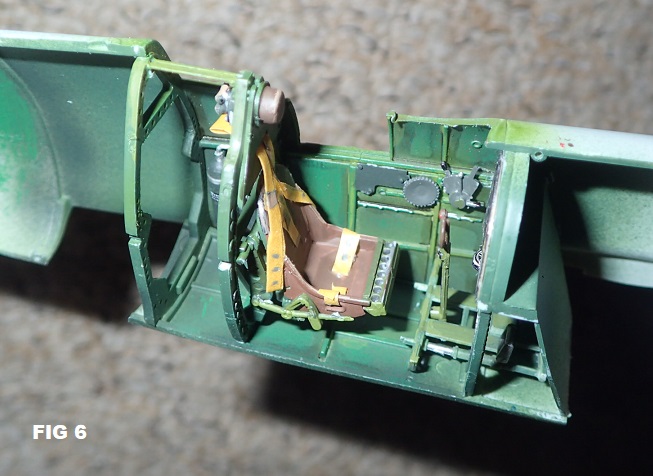
My decision not to throw money at this project didn’t remove any desire to make the kit look as good as it can. After fitting the pre-painted etched console which meant removing a sliver of plastic from the side walls I turned my attention to the seat assembly. (fig 6 and 7)
 |
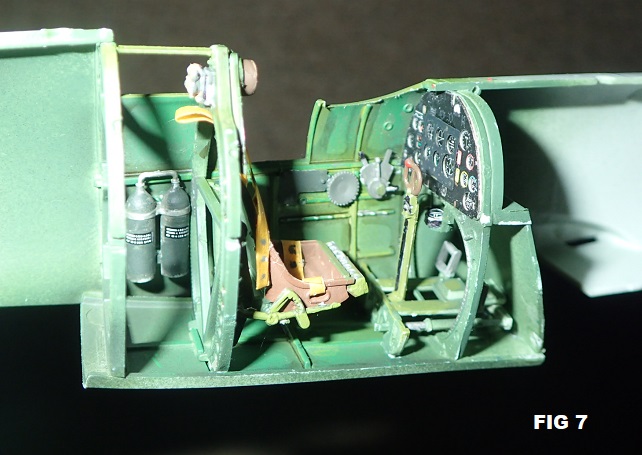 |
This is a rather fragile step so I tackled it lying on its back (the seat that is, not me). This meant gravity was not working against me by pulling the seat away from the 4 tiny mounts on the frame. The thick perforated devise along the seat’s front was for signal flares. I drilled the holes out as I doubted the Germans would have left the flare cartridges in place. That was also true of the RAF radio, so I did not fit it. In its place I put a 1/35 German flare gun as I had read that these were carried by German pilots to fire signals to control towers when arriving or in distress as not all German aircraft had radios. I added seatbelts made from folded masking tape. Holes and buckles painted on to match the etched ones on offer by Eduard. The seat belt loop feeds through the backrest and is attached to a hawser which was made with fuse wire and fed into the void of the fuselage spine. I also added from stretched sprue boden cables from the rear of the foot pedals that would lead of to the rudder linkage. I must admit to very little knowledge on Spitfires so used pictures on the net extensively – many times from other finished models. I didn’t set out to copy anything in particular but to get a feel for the missing detail. The air bottles looked a bit plain, so I added warning placards from spare decals for example. Revell quote there mix of interior green for nearly every surface which would have looked a bit flat so I used some licence as well as other modeller’s examples to add some colour where appropriate.
 Colour would also be key externally so once I’d added all the under wing details such as intakes, I gave it a spray with Humbrol 90. This would be almost totally covered by the Luftwaffe evaluation school yellow but I wanted to have some chipping to reveal its heritage especially around the wheel well openings. As well as the large single piece lower wing I sprayed the inside of the flaps as directed in the Revell instructions, the chin covering and tail underparts.
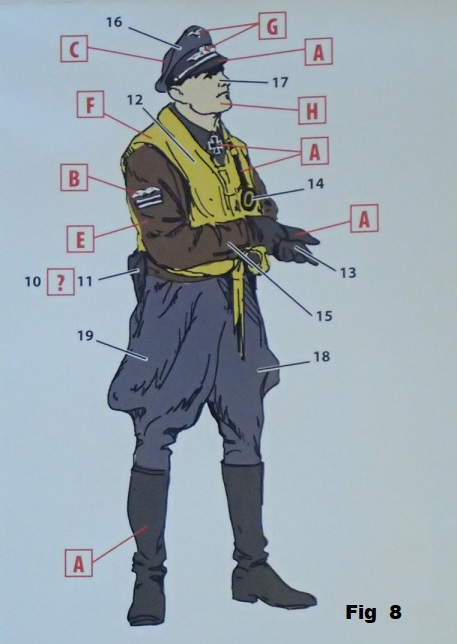
Concurrently I started to put together one of ICM’s German pilot figures from the set of three in box number 32101 (Fig 8). These really are nice figures and I went with the senior figure in a standing pose, equipped with flight jacket and peaked cap.