The idea behind this year’s group build was to produce a diorama, but to keep the size down.
So the members decided to limit the size of the diorama to an A4 size. This proved to be a little bit of a challenge to
get a scene in place and to limit it to this size.
My idea was let’s go small scale with the model and in my stash I had a example of Takoms 1/72nd scale Chieftain and FV432, these were both scaled down versions of their 1/35th models that had been produced in the past few years and proved to be extremely popular.
But what to do with the two models in one box!
A scheme that has always caught the eye for the Chieftain has been the Berlin urban area camouflage scheme used by the British Army’s Berlin Brigade when station in the German capital. This scheme has also been applied to other vehicles used by the brigade, so the search was on to find good references to see if this was possible in the small scale of 1/72nd. The internet provided some photos, but a great reference work was a Tankograd publication on the Brigade and this covered all of the vehicles and gave a detailed write up on the intricate camouflage pattern and the colours used.
 |
 |
The next task was to look for a typical Berlin scene from the 1980’s. The idea being to show how the block nature of the camouflage against an urban scene, this was to be the backdrop for the vehicles if they were ever to fight in the German capital, although some thought that this would be just a token resistance against a possible Soviet assault.
With the help of Sibo from the Salisbury Model Centre we found something that was not an urban scene but a security guard post that was produced by Faller. This is a German company and produce all sorts of buildings and scenes for the German rail enthusiast, all of their building fall into HO railway scale, although not exactly 1/72nd scale but close enough and they fitted into the A4 size of Diorama.
With the addition of some figures from Italeri I had the basics to work on.

Items used in this build.
The three main kits items were.
A Faller Security check- point, in HO scale.
The Takom FV 432 and Chieftain Mk5 in one kit.
And Italeri !/72nd scale NATO troops.
Also additional railway accessories were used for the barbed wire and tarmac base.
Signage and flags were made from home made decals.
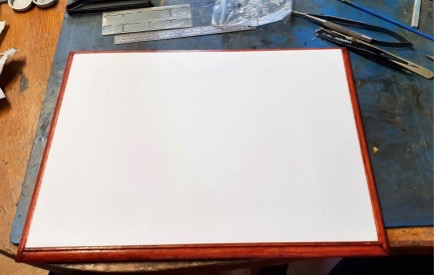
The starting point for me was to get the base the correct size. So a piece of MDF was cut to just slightly smaller than A4 and then this was edged with some decorative beading to give the base a little bit of depth. This was then filled in with some foam board again supplied by SMC. The base covering had to be of a concrete or tarmac nature to represent the hard surface that had to take the weight of the vehicles used by the brigade. So the base was covered with some paper sheets to represent the tarmac surface.
 |
 |
 |
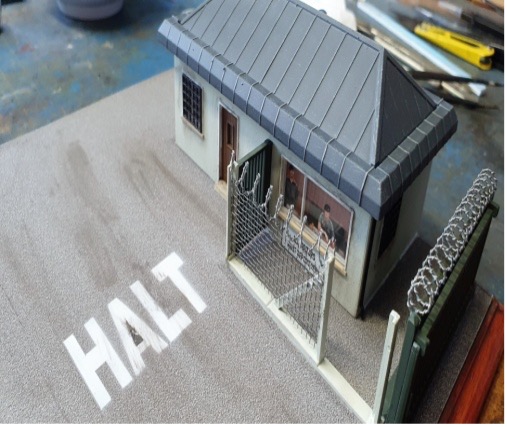
 The next stage of the build was to see how the security checkpoint and associated fencing that came in the Faller kit was going to work out on the area. After the building and fencing were painted to represent the kind of concrete finish that was on these buildings, some of which were probably left over from the war, they were placed on the base to see how it would look. There was obviously one thing missing which stared out straight away and that was signage on the floor surface. As the paper sheets had been laid to use decals for the halt and exit signs was not going to work, so stencils were cut out from paper to make masks so that the signage could be sprayed onto the surface using Mr Hobby colour paints.
Once the paint dried the area was toned down using some pastels to simulate how dirty this area may have become, also it did hide some areas which had become wet and lifted the paper tarmac sheets.
Now that the areas had been worked out, all of the painted fencing and guardroom could be laid out to simulate how the main entrance area may have look at the Barracks.
 |
 |
 With the general lay out finished it was time to turn to the two vehicles that come in the Takom kit.
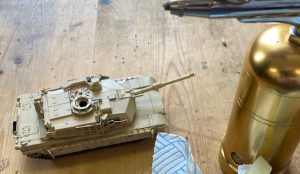
The build was remarkable very easy for both vehicles and the Cheiftain benefited from having the bazooka skirts being in photo-etch which helps to keep the scale thickness of these plates to just about the right thickness. Both of the kits come with link and length tracks but Takom do supply in the kit a little Jig to help get the individual tracks that go around the sprocket and idler wheels the correct shape and alignment, a little patients was all that was required.
Next came the scary part of trying to replicate the block style urban camouflage of both vehicles, and with a lot of help from the Tankograd book the areas were broken down into the four colours that were used in this style of camouflage. Ammo Mig do a set of paints for the British Berlin Brigade and these were used, although they would not have been my choice of paints as I generally find that they tend to be a bit on the thick side and require considerable amount of thinning to get them to spray well enough without having the paint run under any masking.
 |
 |
 |
 |
So after many hours of masking and painting, more masking than anything else, and having tiny amounts of masking tape stuck everywhere on the workbench. I had two vehicles which had the correct camouflage colours in the correct areas on each vehicle.
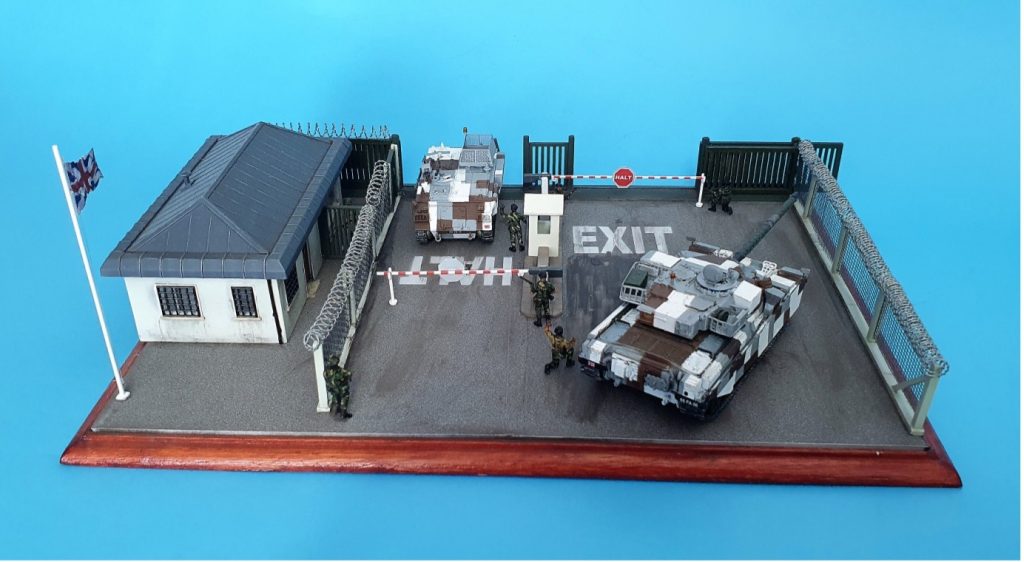
After these marathon sessions of masking and painting I had a good idea of how to place the vehicles on the base and also to give the scene some life on how the figures were going to be placed to try to tell a story which is what a diorama should be telling.
Final details on the build were the figures and trying to get the DPM camouflage which was used by the British Army on these small scale items, all I can say is that I went through several small detailed brushes to try to get this applied to the figures. All of the signage that I use on the gates and guardroom were homemade decals and were laid onto thin plastic card, and the barbed wire for the fencing again was a railway accessory supplied by Sibo from the Model Shop.
On the whole the build was something which I was not used to and I did enjoy the experience of trying to get as much detail into a scene on a small scale as an A4 size diorama.
Here are some pictures of the final product.